


How to Install Faux Locs
Have you ever imagined how locs would look on you, but were uncertain about the hair commitment you want? With our selection of HC locs, you’ll get the perfect opportunity to try out your desired look without much lasting commitment. Recently, our HC locs have become the trendy protective hairstyles you can easily install at home. With our luxurious HC locs range you can embrace the world as the countess you are, and let your hair be a part of your message, giving people something to observe and appreciate. For more information on how to install your faux locs, keep scrolling.
What are faux locs?
Before we go further, let's talk about what faux locs are. Faux locs are a set of protective styling primarily made from synthetic hair whereby the hair is twisted and braided. As a protective hairstyle, your hair is not at risk of damage, provided you understand how to install faux locs correctly. Usually, faux locs last six to eight weeks; they can, in fact, last longer as the older they get, the more natural they look.
How to install faux locs?
Installing faux locs is quite easy, and you can do it yourself. But, it might take up to 3 to 5 hours, depending on the density you are going for and how fast you are at installing the hair. Before we dive into how to install locs the first thing you need to do is get these items.
THE ITEMS YOU NEED:
- The HC Locs Kit is a luxurious faux loc kit that has all your essentials to install your faux locs. Here are the items included in the kit:
- 100 strands of crochet faux locs which is enough for a full-head hair installation.
- 1 HC hair hook: You will need this to install your crochet faux locs.
- 1 HC satin bag
- 10 golden hair jewellery pieces: this comes in handy if you want to accessorize your faux locs. You can attach it to the tip or any other locking part of the locs.
- 1 Argan Oil
You can only get the HC Locs Kit at Humphrey Collections. So, choose HC today to enjoy luxury.
Additional Items Needed:
- Rattail and a wide-tooth comb to assist you in the detangling and sectioning process of the faux locs.
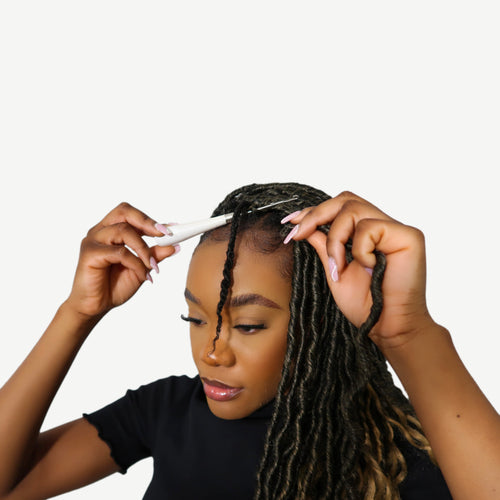
- Edge control for styling your baby hair and completing the look
Prep your hair
After getting these items the next step is to prep your hair. To start with, wash your hair to keep it clean. Washing your hair helps get rid of dirt, sweat, and product buildup. After that, apply the conditioner to keep it moisturized. Leave it for the stipulated time, then wash it off. Rinse your hair thoroughly as a clean scalp is important for your partings.
Step-by-step guide on installing your faux locs on curly/kinky hair
People have different textures of hair. Hence, what works for one texture might not work for another. For this reason, we will guide you on how to install faux locs on both textured and fine hair.
Moisturize
Because curly/kinky hair is prone to dryness, I cannot stress how you need to moisturize it. Besides, your natural hair will be inside the locs for a while, and you won't be able to moisturize it to its full extent. So, don't skip this step. If you have moisturizers, you can go ahead and use them. Afterwards, you can use coconut oil or olive oil. These oils seal in moisture in your hair and add essential nutrients.
Stretch your hair
Curly/kinky hair is prone to shrinkage, so you need to stretch it. There are different methods of stretching your hair. You could either use a blow dryer and a brush. Or you could section your hair into four parts and use ponytail holders to wrap each section. Once the hair is air dry, remove it and comb your hair with a wide-tooth comb.

Install the faux locs
Now to the main business, the first thing to do is to braid your hair into cornrows. Braid it loosely so the crochet hook will pass through easily without causing pain. Then moisturize your hair once again by applying oil to all the parts. Insert the crochet hook to pass through the root of your cornrow, then attach the loop part of the lock to it and close the latch. Gently pull it through the base of your hair towards the other side up to about 3 inches, then open the latch and remove the hook. Insert the end of the loc into the loop. Pull it through until the loc is firmly secured to your hair. Repeat the process till you get the density of locs you want on your hair. Finish by applying edge control to your edges.
Detangle your hair using a wide toothcomb. Divide your hair into four even box-shaped sections by making a parting from your forehead to your neck and then a parting from your right ear to your left ear. To ensure the partings are clean, place hair cream in between partings and use the rattail combs to re-part so you can have clear straight lines at the hair root.
In one of the four sections, you have made, part your hair into 10, two centimetres using a rat comb. Plat the divided hairs into braids
Insert the crochet hook at the bottom of your braid and pass through the root of your braid, then attach the loop part of the lock to it and close the latch. Gently pull it through the base of your hair towards the other side up to about 3 inches, then open the latch and remove the hook. Insert the end of the loc into the loop. Pull it through until the loc is firmly secured to your hair. Repeat the process till you get the density of locs you want on your hair. Finish by applying edge control to your edges.
Step-by-step guide on how to install faux locs on fine/thin hair
Moisturize:
After washing and conditioning your hair, use a moisturizer or coconut oil to hydrate your hair.
Install the faux locs
The next step is to install your locs. Follow the same steps mentioned in the section above. But, when picking faux locs for your fine/thin hair, opt for lightweight locs with short lengths. This is because if you go for longer locs, there might be tension on your scalp.
Final Thoughts
So, that's how to install faux locs. If you follow the step-by-step guide mentioned in this article, you are on your way to becoming a pro at installing faux locs. Check out our selection of locs; with more than 20 different hairstyle options, your latest protective style is here and waiting for you.